
How to Store, Organize, and Display Your Zillion Baby Photos
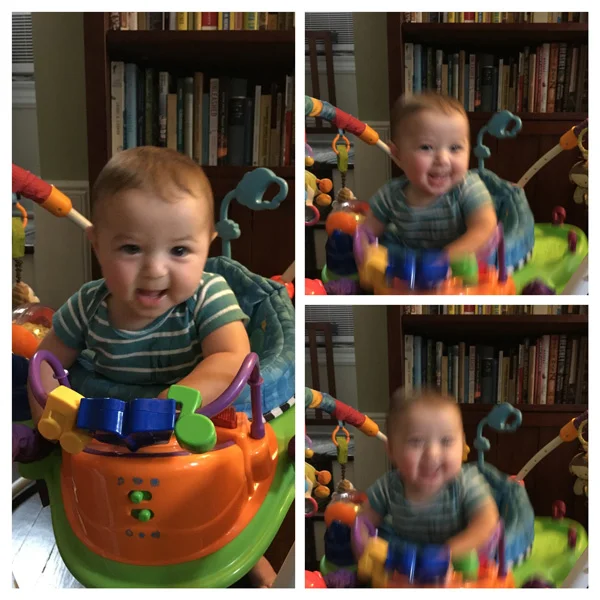
/Like most moms, I'm constantly taking pictures of my kids. I have photos of my oldest from literally every day of the first year of her life. And since toddlers don’t pose, each moment I shoot on camera has about 5 or 6 different outtakes. Multiply that by their age in days, and we’re talking close to 10,000 photos and counting! Pare down, you say? Ever try to delete a photo of your child? That would be like picking out a Cronut to throw away (um, they’re all good, even the ones that don’t look perfect!). Take these three photos. It's blurry because he's bouncing. So cute! How am I supposed to delete that? Which brings us to...
How am I ever going to organize these pictures into albums? And what happens if I lose my phone? It’s enough to make any mom dump the jpegs on her desktop and call it a day.

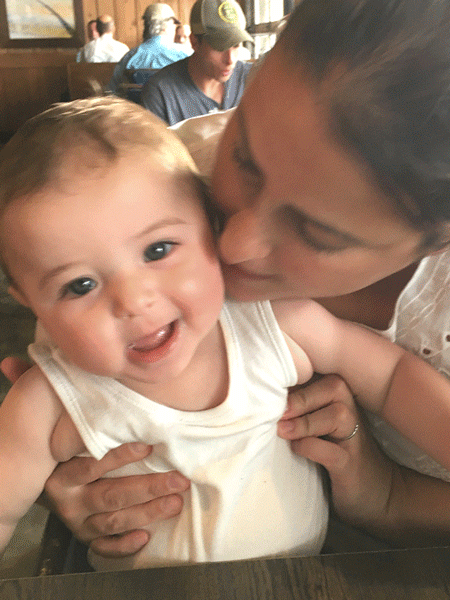
Photo by Jaye McLaughlin
You can get your pictures under control quickly and easily—all it takes is a plan, and you’ve got to find one that works for you. I’ve collaborated with professional (amazing!) kids and family photographer Jaye McLaughlin of The Life in Your Years Photography to tackle the harrowing topic of what to do with all those photos and show you what has worked for us. Read on for my system and her professional tips. This is the first installment of a 3-part series.
But first, have you entered our giveaway? Win a Family Four Pack of tickets to LEGOLAND Discovery Center at Ridge Hill in Yonkers! To be entered in the drawing, email info@babygotchat.com with your full name, hometown, and phone number. I'll be collecting entries until July 31st.
PART 1: STORE YOUR PHOTOS
If your photos live solely on a phone or computer, you’re one accident away from losing all your irreplaceable family memories. Sure, you have some pics on Facebook, but most of those aren’t high quality enough to print. You need a place to put the photos where they are backed up and safe. At home, we have an external hard drive and it’s great for storage, but it makes accessing and sorting through the photos a pain. And besides, what mom can sit down at a computer with jealous children yelling and swatting at the keyboard? I need photos I can wade through while holding my phone high in the air out of reach.
Enter Google Photos. Not only does it store your photos in the cloud, where fire, rain (ironically), and tiny hands that seek to destroy aren’t an issue, but it also contains searchability and auto-formatting that traditional hard-drive desktop folders can't offer. I can launch the app on my phone and click a button called “Free Up Space” that will back up AND delete local copies to clear out my phone’s memory so I can shoot 100 more 30-second video clips of my son maybe-almost-but-actually-not-crawling.
Google Photos also uses face recognition so you can sort by person. Their search bar is so advanced, I can search by location (it automatically geotags your photos), by keyword, by specific date, etc. I’ve searched things like “playground”, “library”, “receipt”, “paint” and found what I was looking for. The is a huge advantage to using your computer's folders because you aren't limited to only knowing the date and file name. You might not remember exactly when that hibachi dinner was, but on Google Photos it doesn’t matter because you can easily figure it out with a keyword, person, or location search.
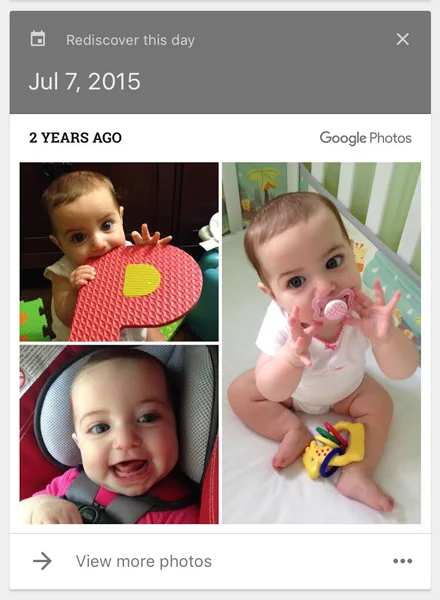
The home screen has an Assistant tab that displays flashback photos (“Rediscover this day”), automatically makes collages and albums based on date or location, and makes gif animations from your bursts or series of similar photos. You can also make your own versions of animations or collages.
Google Photos has a free version, but we decided to migrate every picture we've ever taken. For access to upgraded storage and features, we pay $10 a month. To give us peace of mind and ease of use, it’s totally worth it.

Photo by Jaye McLaughlin
Jaye has a more professional storage system if you want to go the hard drive route or can’t handle the thought of all those files not being tucked neatly into folders. She writes:
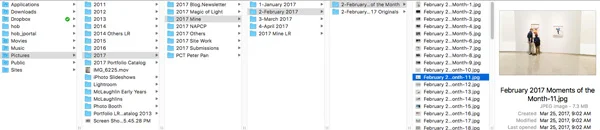
Start with a “Pictures” folder, create subfolders within for each year, then make subfolders in those for each month. I start these folder names with the number for each month (i.e. “1-January”). Why? Because your computer will list the months in alphabetical order if you don’t give it some reason not to.
Once a month, I make sure that all the photos I have recently taken have been downloaded to my computer. I save them all in a folder of originals labeled for that month. I go through this folder and delete the duds and duplicates. Then I sort them into the “Pictures” folder by date.
That’s it for now. In our next installment, we’ll talk about how to organize your photos to quickly create albums of print-ready or photobook-ready shots. A special thanks to Jaye McLaughlin for her tips! For more photo advice, check out her blog.
And don't forget to enter our giveaway! Email info@babygotchat.com with your full name, hometown, and phone number. I'll be collecting entries until July 31st.
As always, check our website for events and weekly library programs.
See you next time!
Andrea